Understanding the RV Collision Repair Process
The Anatomy of Your RV: What Gets Damaged in a Collision?
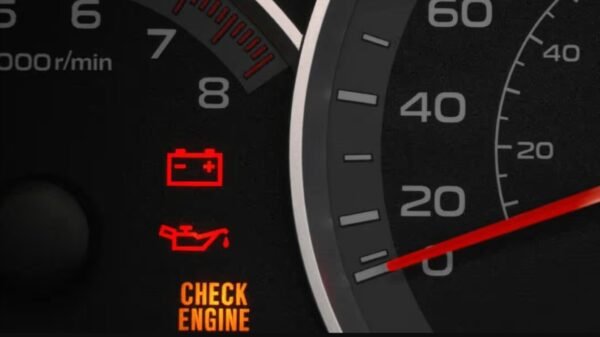
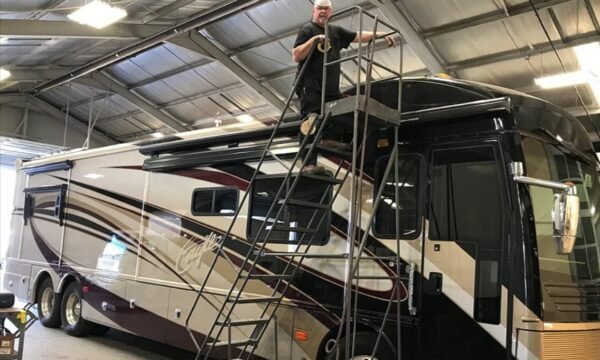
Recreational vehicles (RVs) are unique in that they encompass a variety of components, including the chassis, frame, exterior shell, electrical systems, and interior features. Understanding the anatomy of an RV can help owners recognize what areas are vulnerable in a collision. The most common areas that sustain damage include the front and rear ends, which often include the bumpers and fenders. Additionally, RVs may suffer from roof damage due to their height and exposure to other vehicles on the road or overhead structures.
Beyond visible exterior damage, collisions can compromise the structural integrity of an RV. Collisions often result in alignment issues that affect the handling of the vehicle, presenting risks not just for the occupants, but also for other road users. Interior systems such as plumbing, electrical wiring, and appliances can also be affected by collisions, which may lead to a cascade of repair needs. Given the convergence of these diverse components, a thorough understanding of what parts may need to be repaired or replaced is critical for RV owners navigating the aftermath of a collision.
From Assessment to Completion: A Step-by-Step Guide
The RV collision repair process can be daunting, but breaking it down into manageable steps can make it significantly easier to navigate. Initially, the accident should be reported, and documentation, including photographs of the damage and information from the accident report, should be collected. This evidence will be invaluable when dealing with insurance companies and repair shops.
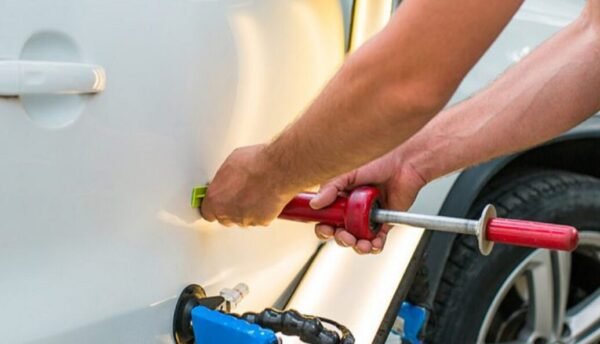
The next step involves getting a thorough assessment of the damage. A qualified technician should conduct a comprehensive inspection to identify both visible damages and underlying issues that may not be immediately apparent. Once the assessment is complete, you’ll receive an estimate covering the costs of parts and labor. Be sure to ask questions about the estimate, including the necessity of each repair, estimated timeframes, and how used or OEM components may affect costs.
Once you approve the estimate, the repairs begin. The shop will typically cover labor-intensive tasks such as body work, replacement of damaged parts, and, if necessary, alignment adjustments. After repairs are made, quality control inspections should ensue, ensuring everything has been properly addressed. Finally, the completed RV should be returned to you, ideally with documentation detailing the repairs done. Following these steps allows for a more structured and clear approach to getting your RV back on the road.
Timeframes and Costs: How Long Will It Really Take?
Understanding the timeframes and costs associated with RV collision repairs is essential. The timeline for repairs can vary widely based on the extent of the damage, the availability of parts, and the shop’s workload. On average, simple repairs can take a week, whereas severe damages may require up to several weeks or even months. Factors such as the complexity of labor, parts availability, and whether the repair shop is waiting on insurance approvals can also play a significant role in how long repairs take.
As for costs, the average repair may range from a few hundred to several thousand dollars. Minor issues, such as cosmetic damage, could only cost a couple of thousand dollars, whereas more serious structural repairs could escalate into the tens of thousands. Be aware of the distinction between labor rates at independent shops versus those at corporate chains; the former may offer more competitive pricing, albeit with potentially less standardized repair processes. Understanding what you can expect allows for better financial planning and helps avoid surprises that could derail your travel adventures.
Choosing the Right Repair Shop: The Road Less Traveled
What to Look For: Certifications That Matter
Choosing the right repair shop is crucial for high-quality repairs. Look for certifications such as those from the National Institute for Automotive Service Excellence (ASE), which demonstrates that technicians have met rigorous industry standards. Additionally, the RVDA (Recreation Vehicle Dealers Association) certification can indicate expertise specifically tailored to RV repairs. These certifications reflect a commitment to ongoing education and proficiency that can help ensure that your RV is in capable hands.
Beyond certifications, consider the shop’s experience with RVs specifically. Not all body shops have the same level of exposure to RV repair. A facility that specializes in RV repairs may have the right tools and knowledge to handle unique RV issues that standard auto body shops may overlook. Furthermore, inquire about their warranty on repairs; a solid warranty often reflects confidence in their workmanship and serves as added reassurance for customers seeking long-lasting repairs.
Questions to Ask: Ensuring You’re Making the Right Choice
Once you’ve narrowed down potential repair shops, asking the right questions can help finalize your decision. Begin by inquiring about their experience with your particular make and model. This is especially important for customized or vintage RVs, where specialized knowledge may be necessary to restore unique components correctly. Additionally, ask about their process for obtaining parts; whether they utilize OEM parts or aftermarket versions can significantly impact your RV’s overall quality post-repair.
Moreover, understand the shop’s communication process during the repair. A reputable shop will keep you updated on the progress and address any changes to the timeline or cost promptly. Finally, ask for references or online reviews to gauge the experiences of past customers. Positive feedback from others can instill confidence that you are making the right choice for your RV repair needs.
Local vs. National: Pros and Cons of Different Repair Shops
When considering repair shops, you may find yourself weighing local versus national options. Local shops often have the advantage of personalized service and a reputation that keeps them accountable to their community. They tend to be more flexible with customization and understanding of customer concerns. A local shop may also provide quicker turnaround times due to less bureaucratic red tape compared to corporate chains.
On the other hand, national chains may boast standardized practices, which can instill confidence in quality and pricing transparency. They often have access to more resources and parts in greater volume, potentially reducing wait times for repairs. However, some customers may find that corporate chains sometimes fail to deliver the tailored service that smaller shops offer. Ultimately, your choice should hinge on your specific needs, proximity, and comfort level with the repair shop’s approach.
Insurance Considerations: Navigating the Claims Journey
Understanding Your Policy: What’s Covered and What’s Not?
Before you dive into the collision repair process, it’s essential to understand your insurance policy’s coverage specifics. Many RV insurers offer comprehensive plans that could cover collision damages, repairs, and more. However, not all policies are created equal, and exclusions or deductibles may apply that can significantly affect out-of-pocket costs. Most owners will want to ensure they have collision coverage that pays for the damage to their RV, regardless of fault, as well as liability coverage to protect against damages caused to others.
Moreover, investigate any additional protections, such as personal effects coverage or additional replacement costs for parts and components that may be hard to come by following an accident. Taking the time to fully comprehend your policy empowers you with the knowledge needed to navigate the claims process effectively. This understanding can prove vital should disputes arise during the repair process or when interacting with adjusters from insurance companies.
Tips for Smooth Claims Processing: Your Ultimate Guide
Successfully navigating the claims process can be as challenging as the repairs themselves. To facilitate a smoother experience, start by notifying your insurance company as soon as possible after the accident. Many insurers have specific timeframes in which you must file a claim. Documenting the accident with photographs, detailed descriptions, and gathering witness statements can substantiate your claim and speed up the process.
Maintain communication with both your insurance adjuster and the repair shop. Establishing a direct line of communication between these two parties can reduce misunderstandings and ensure all necessary details, such as repair estimates and parts lists, are shared efficiently. If you’re ever in doubt about the claims process or your coverage, don’t hesitate to reach out to your insurance company for clarification.
Working with Adjusters: How to Advocate for Your Needs
Successfully advocating for your needs when dealing with insurance adjusters is pivotal to ensuring you receive fair treatment. When the adjuster arrives to assess the damage, be present to point out any areas of concern. Don’t rush the conversation or rush to accept the first estimate; it’s important to review what is and isn’t covered comprehensively. Adjusters may have a tendency to work within set guidelines, which means it is essential to be assertive but polite in articulating your needs.
After your initial assessment, request a detailed written estimate that breaks down all costs involved in repairs and any necessary components. While it may take time and patience to negotiate with adjusters, knowing your policy inside and out and documenting every conversation will empower you in this process. This diligence can go a long way toward ensuring you maintain your RV’s integrity and receive the repairs necessary to return to the road safely.
Post-Repair Considerations: Keeping Your RV Roadworthy
Inspecting Quality: Signs of a Job Well Done
When your RV is finally repaired and ready for pick-up, the first step is to conduct a thorough inspection. Look for evidence that repairs have been effectively completed and consistent with what was outlined in the original estimate. Familiarize yourself with visual signs of a quality job straight and even seams, paint that matches the surrounding areas without noticeable overspray or fade, and the alignment of doors and compartments.
In addition to visual cues, function checks should be part of your inspection. Make sure that not just the aesthetic qualities are up to standard, but that essential systems like plumbing, electrical components, and appliances function as expected. If anything seems amiss, don’t hesitate to bring those concerns to the repair shop’s attention immediately, as it’s crucial to address any issues while the repair shop is still engaged.
Future-Proofing Your RV: Maintenance Tips After Repair
After your RV has undergone repairs, future maintenance becomes paramount to extend the life of your vehicle and avoid further costly damages. Regularly inspecting vulnerable areas such as seals around windows and roof, undercarriage suspension points, and brake systems will help you catch potential issues before they escalate. Ensure proper tire maintenance, including pressure checks and rotation, and schedule routine engine diagnostics to keep everything in optimal condition.
Investing in additional protective measures, such as protective coatings or coverings for exposed areas, can also help maintain the integrity of your RV. The goal should be to stay vigilant and proactive, minimizing wear and tear as much as possible. A routine check-up or preventive maintenance every few months is advisable and can save you in repairs down the line.
Understanding Warranty Offers: What to Know Before You Go
Finally, understanding warranty offers on repairs is a critical aspect of your post-repair considerations. Many reputable repair shops provide some form of warranty on the work performed, often ranging from six months to several years. It’s crucial to read the fine print and understand what is covered under this warranty. Does it cover materials, labor, or both? Are there limitations based on wear-and-tear or misuse? Knowing these details can save you from unexpected repair costs further down the line.
In addition, consider the warranty factors offered by your insurance. Some policies may cover additional repairs that arise due to a previous collision, potentially protecting you against future issues stemming from the initial repair. Knowing what warranties are available to you offers peace of mind and can be a critical factor in maintaining your RV in prime condition for years to come.